
Last Updated: October 25, 2026
Quick Summary
Patio pavers shifting occurs when the foundation beneath them fails, most commonly due to poor base preparation, soil settling, water saturation, and missing edge restraints. Prevent patio pavers shifting by compacting 4-6 inches of aggregate base in multiple passes, installing concrete edge restraints at least 6 inches deep, ensuring proper drainage with a 1-2% slope, and using polymeric sand to lock joints together.
- Compact the base layer with at least 3-4 passes using a plate compactor until material no longer shifts underfoot.
- Install concrete edge restraints at least 6 inches deep and anchor every 2-3 feet with rebar or metal stakes.
- Grade your patio with a 1-2% slope to direct water away and prevent saturation beneath the pavers.
- Use polymeric sand instead of regular sand to lock pavers together and resist water washout for 5-10 years.
- Inspect your patio seasonally for pavers higher or lower than neighbors, cracks, and widening gaps to catch shifting early.
Table of Contents
- Why Patio Pavers Shift: Diagnosing the Root Cause
- Paver Base Preparation and Compaction: The Foundation That Holds
- Paver Edging to Keep Pavers in Place: Containing the Perimeter
- Drainage and Water Management: Preventing Saturation and Settling
- Polymeric Sand for Patio Pavers: Locking Joints and Reducing Movement
- How to Fix Shifted Patio Pavers: Repair and Relevel
- Ongoing Maintenance to Keep Your Patio Stable
- Request a Professional Patio Assessment
- Frequently Asked Questions
Why Patio Pavers Shift: Diagnosing the Root Cause
Patio pavers shift when the foundation beneath them fails. Understanding what causes patio pavers shifting is the first step to preventing it from happening in the first place.
Ground settlement and soil instability
Soil moves. It compacts over time, settles unevenly, and shifts when water passes through it.
When soil isn't compacted properly before installation, it continues to settle after the pavers go down. Uneven settling creates low spots.
Poor drainage makes settling worse. Water saturates the soil beneath your patio, and as it drains, the soil compacts further.
Inadequate base preparation
The base layer is everything. It's what prevents patio pavers from shifting.
Many homeowners and contractors rush the base. They spread a few inches of gravel, compact it once, and move on. A proper base takes time and multiple passes with a compactor.
The base should consist of:
- 4-6 inches of compacted aggregate base (crushed stone or gravel)
- Multiple compaction passes until the material no longer shifts under foot traffic
- Proper grading so water drains away from the patio area
Without this, pavers have nothing stable to rest on.
Freeze-thaw cycles and water damage
Water is the enemy of patio stability. In freeze-thaw cycles, water enters the base layer, freezes, expands, and pushes pavers upward.
This happens repeatedly through winter months. Each cycle moves pavers slightly. By spring, the damage is visible.
Water also weakens the bond between the base layer and the soil beneath it. Saturation reduces soil stability significantly.
Missing or failing edge restraints
Pavers at the perimeter of your patio need containment. Without edge restraints, perimeter pavers migrate outward. This causes a chain reaction. Interior pavers shift inward to fill the gaps.
Edge restraints lock pavers in place. They prevent outward movement and keep the entire system stable.
Paver Base Preparation and Compaction: The Foundation That Holds
A solid base prevents patio pavers shifting. This is where durability begins.
Excavation and subgrade preparation
Start by removing the top layer of soil and organic material. Dig down to stable, undisturbed soil.
Grade the subgrade so water runs away from the patio area. A 1-2% slope is ideal. This prevents water from pooling beneath the pavers.
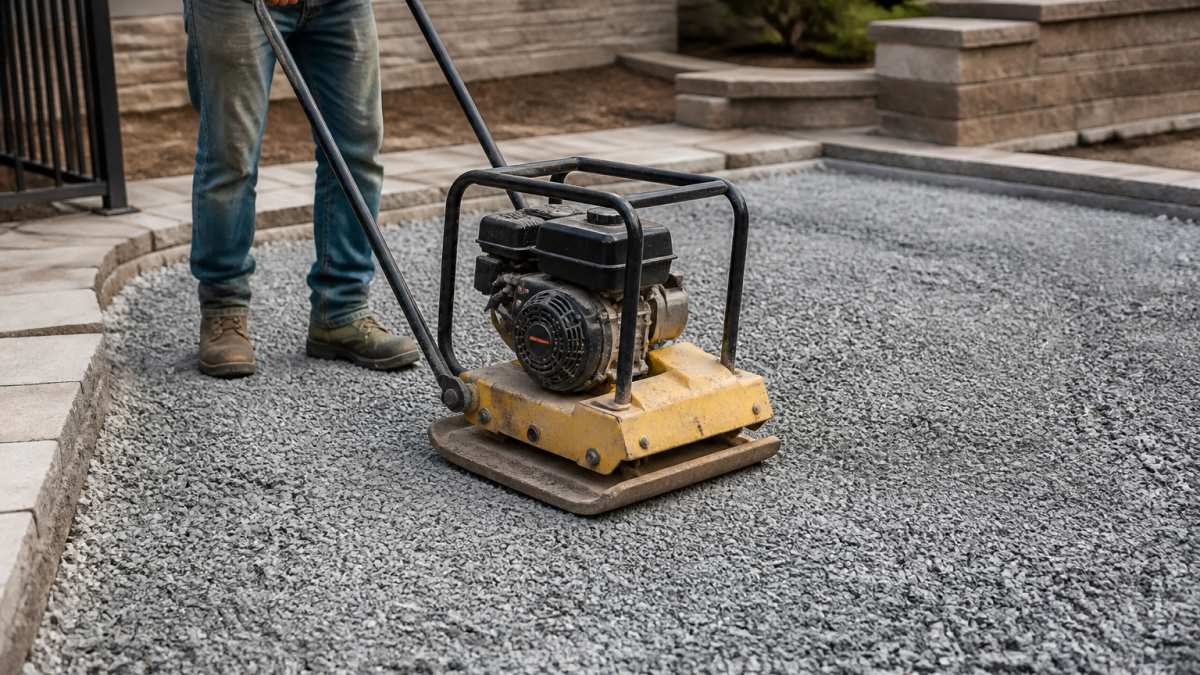
Compact the subgrade with a plate compactor. Make multiple passes until the soil no longer shifts under foot pressure.
Aggregate base layer specifications
Lay 4-6 inches of compacted aggregate base material. Use crushed stone or angular gravel. Angular material locks together better than rounded gravel.
Spread the aggregate evenly. Compact it thoroughly with a plate compactor.
The base should feel solid underfoot. If you can shift the material by stepping on it, compact more.
Compaction techniques and equipment
A plate compactor is essential. Hand tamping is not sufficient for proper base preparation.
Plate compactors come in various sizes. For residential patios, a 200-300 pound machine works well.
Compact in a grid pattern. Go north-south, then east-west. This ensures even compaction throughout.
Check your work. The base should not shift when you walk on it with your full weight.
Paver Edging to Keep Pavers in Place: Containing the Perimeter
Edge restraints are what keep patio pavers from shifting outward. They're non-negotiable for long-term stability.
Concrete edge restraints vs. plastic edging
Concrete edge restraints are permanent. They're poured or installed along the perimeter of your patio.
Concrete edges work best for patios that will stay in place permanently.
Plastic edging is temporary containment.
Plastic edging is cheaper initially. But when it fails, pavers shift again.
For lasting stability, concrete edges prevent patio pavers from shifting more reliably than plastic alternatives.
Installation depth and anchoring
Edge restraints must be installed deep enough to hold pavers in place. Shallow installation fails quickly.
For concrete edges, dig a trench at least 6 inches deep along the perimeter. Pour concrete into the trench, extending it above grade by 1-2 inches. This creates a lip that holds pavers against outward pressure.
Anchor the concrete edge every 2-3 feet with rebar or metal stakes. This prevents the edge itself from shifting.
For plastic edging (if you choose it), install it at least 4-6 inches deep. Stake it every 12 inches. Even with proper installation, expect plastic edging to degrade and require replacement.
Drainage and Water Management: Preventing Saturation and Settling
Water management is critical to preventing patio pavers from shifting. Proper drainage keeps the base stable.
Proper slope and grading
Grade your patio so water runs away from the structure. A 1-2% slope is standard.
Slope the patio surface itself, not just the subgrade. Water should run off the pavers, not pool on top.
Direct water away from the house foundation and any low-lying areas. Water that collects near the patio will eventually seep beneath it.
Subsurface drainage solutions
For patios in areas with poor natural drainage, install a subsurface drainage layer.
Place perforated drainage pipe beneath the base layer, sloped to direct water away from the patio area.
This system keeps water from saturating the base layer.
Alternatively, use a permeable base material that allows water to drain through it.
Polymeric Sand for Patio Pavers: Locking Joints and Reducing Movement
Polymeric sand locks pavers together and reduces movement within the patio surface.
How polymeric sand differs from regular joint sand
Regular joint sand (also called paver sand or mason sand) is just crushed stone.
Polymeric sand contains a resin binder. When activated with water, it hardens and locks pavers in place.
Polymeric sand also prevents weeds and insects from entering the joints. It's more durable than regular sand.
The trade-off: polymeric sand costs more upfront.
Installation and maintenance of polymeric sand
Sweep polymeric sand into the joints between pavers. Fill joints completely, leaving no gaps.
Once filled, activate the polymeric sand by misting it lightly with water.
Do not oversaturate. Too much water can cause the resin to cure unevenly or create staining.
After curing (typically 24-48 hours), the joints harden.
Maintain polymeric sand by reapplying it to joints that show wear.
How to Fix Shifted Patio Pavers: Repair and Relevel
If pavers have already shifted, you can repair the damage. The key is addressing the underlying cause while you fix the surface.
Assessing damage and determining repair scope
Walk your entire patio. Look for pavers that are higher or lower than their neighbors. Mark them with chalk.
Check for cracking. Shifted pavers often crack from stress. Cracks that radiate outward indicate pressure from shifting pavers.
Determine how much of the patio needs work.
Lifting, releveling, and resetting pavers
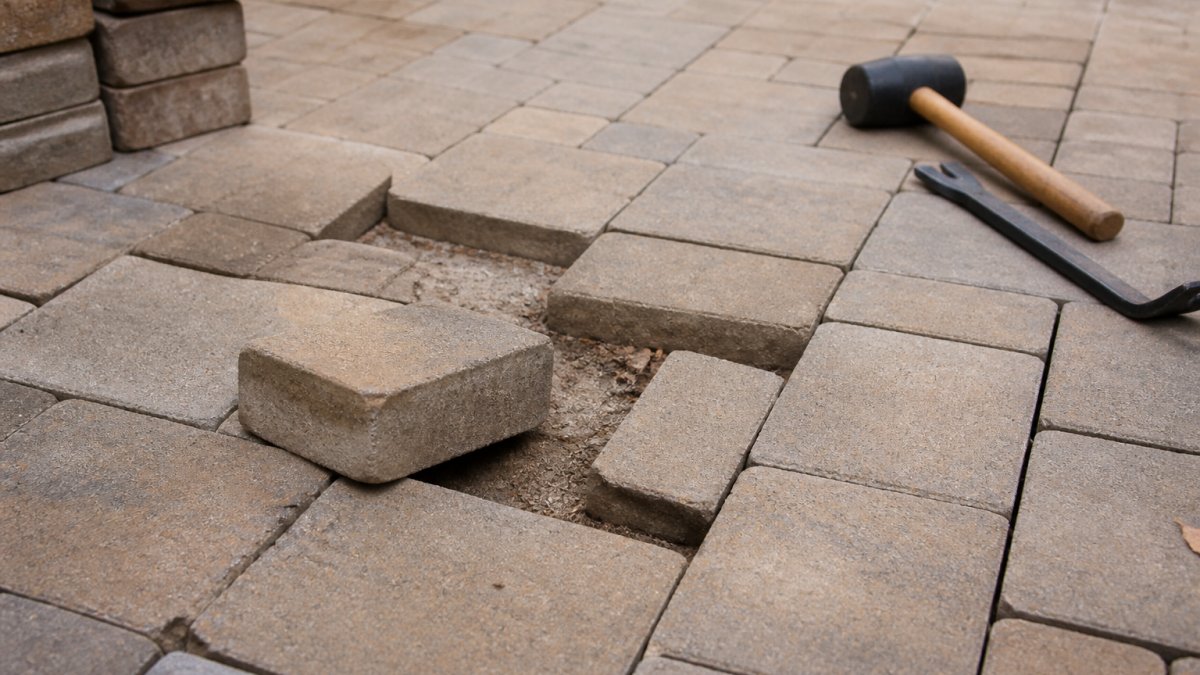
Start by removing the shifted pavers. Use a pry bar to lift them carefully. Set them aside.
Remove the bedding sand beneath them. Check the base layer underneath.
Spread fresh bedding sand (or polymeric sand) evenly across the area.
Reset the pavers one at a time.
Fill joints with polymeric sand once all pavers are reset.
Addressing the underlying cause during repair
Repair is temporary if you don't fix what caused the shifting.
While pavers are lifted, inspect the base layer.
Check drainage around the patio.
If edge restraints are missing or failing, install them while the patio is open. This prevents future outward movement.
Taking time to address root causes during repair extends the life of your patio significantly.
Ongoing Maintenance to Keep Your Patio Stable
Prevention is easier than repair. Regular maintenance catches problems early.
Seasonal inspections and early warning signs
Inspect your patio at the start of each season. Look for:
- Pavers that are higher or lower than their neighbors
- Cracks radiating from pavers
- Gaps widening between pavers
- Water pooling on the surface
- Weeds growing through joints
Early signs of shifting are subtle. A single paver slightly high or a small gap is easy to miss. But these are warnings that movement has started.
Address these signs immediately. Releveling one or two pavers is much easier than fixing a patio where half the surface has shifted.
Joint sand replacement and compaction
Over time, joint sand washes out or compacts. This allows pavers to move more freely.
Check joint sand annually. If it's low or missing, sweep new sand into the joints. Use polymeric sand for durability.
Compact the sand by sweeping it multiple times until it's firmly seated in the joints.
Well-maintained joints keep pavers locked together and reduce shifting significantly.
Request a Professional Patio Assessment
Preventing patio pavers from shifting requires proper base preparation, edge containment, drainage management, and ongoing maintenance. These steps work together to create a stable, lasting patio.
If your patio is already showing signs of shifting, or if you're planning a new installation and want it done right the first time, professional assessment makes a difference. Explore professional hardscaping services including patios, retaining walls, walkways, and outdoor living spaces. We handle everything from base preparation and compaction to edge restraint installation and drainage solutions. Book a hardscaping consultation to have your patio assessed by professionals who know what stability requires.
| Prevention Strategy | What It Does | When to Apply |
|---|---|---|
| Proper base compaction | Stabilizes soil and prevents settling | During initial installation |
| Concrete edge restraints | Locks pavers in place at perimeter | During installation or repair |
| Polymeric sand | Binds pavers together and resists washout | During installation or repair |
| Proper drainage | Prevents water saturation beneath patio | During installation or repair |
| Seasonal inspections | Catches shifting early before major damage | Every 3-4 months |
| Joint sand maintenance | Keeps pavers locked and stable | Annually |
Frequently Asked Questions
How can I prevent my patio pavers from moving?
Prevent patio pavers from shifting by combining four strategies: install a stable, properly compacted base layer at least 4 inches deep; use edge restraints along the perimeter to contain lateral movement; apply polymeric sand in the joints to lock pavers together; and ensure proper drainage with a slope of at least 1 inch per 4 feet. Regular maintenance, including seasonal inspections and joint sand replacement, catches early settling before it becomes severe.
What type of edging keeps patio pavers from moving?
Concrete edge restraints and plastic paver edging both work, but they differ in durability. Concrete edges provide permanent containment and handle freeze-thaw cycles better, making them ideal for high-traffic or sloped patios. Plastic edging costs less and suits smaller projects or temporary solutions.
Can poor drainage cause pavers to shift?
Yes. Poor drainage causes water to accumulate beneath the base layer, softening the soil and causing uneven settling. This leads to low spots where pavers sink and edges where they shift upward. Water also accelerates freeze-thaw damage in cold climates. Proper grading (at least 1 inch of slope per 4 feet), a perforated underdrain if the site is naturally wet, and permeable bedding sand all direct water away from the patio foundation, preserving soil stability.
What is the downside to polymeric sand?
Polymeric sand hardens when wet, which locks joints effectively but makes future repairs harder, removing pavers for relevel or replacement requires breaking out the hardened sand. It also requires precise installation: the paver surface must be completely dry before watering, or the sand will cure prematurely and crack. In very wet climates, polymeric sand may not cure properly if humidity stays high. Regular joint sand is easier to replace seasonally but offers less movement resistance.
For paver patio installation costs and what to expect, our pricing guide breaks down the investment required for proper hardscaping that prevents these problems from the start.
